Clear Redis RBAC Cache
rConfig Vector – Server Installation
8 mins
Vector
Terminal window Terminal window
Terminal window Terminal window Terminal window Terminal window Terminal window Terminal window
Terminal window
Terminal window Terminal window
Terminal window Terminal window 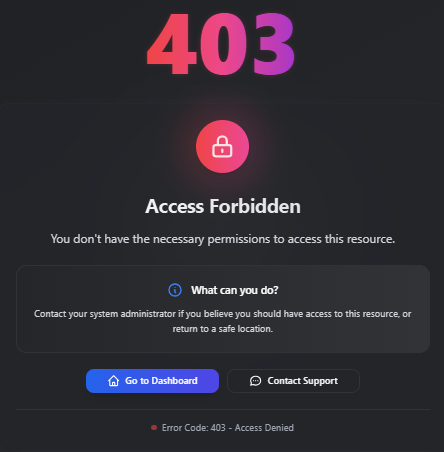
Terminal window
Terminal window
Introduction
Section titled “Introduction”Licensing
Section titled “Licensing”rConfig Vector is a licensed product. You will need a valid license to use the product. If you do not have a license, please contact us at [email protected] to obtain a license. rConfig V8 Professional users are able to upgrade existing licenses and installations to rConfig Vector.
Prerequisites
Section titled “Prerequisites”Before you begin the installation, ensure you have the following:
Server requirements
Section titled “Server requirements”The server requirements are almost the same as rConfig V8. See /getstarted/os-setup/ for updated information. But we do expect some enhanced resource requirements for the server. The following are the minimum requirements for the server:
- 4 CPU Cores minimum
- 16 GB RAM minimum
- 250 GB Disk Space minimum
Infrastructure and Security requirements
Section titled “Infrastructure and Security requirements”In most, but not all cases, rConfig Vector server will be need to be accessible from the internet for the agents to connect to it. Of course, the agents can connect privately also, should connectivity and routing allow it. Ensure you have the necessary infrastructure and security measures in place to allow this.
We expect the server to be accessible on port 443 (HTTPS) from the internet. Ensure you have the necessary firewall rules in place to allow this, and that you have a valid SSL certificate installed on the server.
Requirements:
- Public IP address (Natted or direct), with inbound source IP restrictions
- Firewall rules to allow inbound traffic on port 443 only from the agents source IP addresses
- Valid SSL certificate installed on the server (no self-signed certificates). Must be TLS 1.2 or higher.
- DNS entry for the server
- Reverse DNS entry for the server (optional but recommended)
- Outbound internet access from the server for pinging rConfig for updates
- Monitoring, we expect customers to add this IP address to their monitoring systems to ensure secure connectivity at all times.
- Any other security measures you feel are necessary to secure the server, such as 2FA, IPS, IDS, etc.
Installation
Section titled “Installation”Actual installation steps are very similar to V8 Professional and a very easy to follow.
Complete the rConfig Vector Server installation by following three steps. Please run
all steps as root
- Setup a new MySql or MariaDb User account
- Download the deployment script
- Run the initialization deployment script
- Verify the installation
Install steps per OS type
Section titled “Install steps per OS type”Setup a MariaDB/ MYSQL User
Section titled “Setup a MariaDB/ MYSQL User”Rocky 9+ users will need to create a new user and password for the database. Login to the MariaDB/Mysql Database server using the root user. The root user password is the same as the one you used in the OS install script.
sudo mariadb -u root -pCreate a user and password for your database. An example is provided below, but be sure to update the username and password to something more secure and unique.
The grant statement below does create the user and grant them privileges in one go.
GRANT ALL PRIVILEGES ON *.* TO 'user1'@localhost IDENTIFIED BY 'password1';FLUSH PRIVILEGES;quit;Download the deployment script
Section titled “Download the deployment script”mkdir -p /var/www/html/rconfig8cd /var/www/html/rconfig8wget https://dl.rconfig.com/downloads/rconfig8-vector-deploy.sh -O rconfig8-vector-deploy.shchmod +x rconfig8-vector-deploy.shNote: Hit the enter key to accept the defaults when prompted during the download and setup process.
First run Initialization of the deployer script
Section titled “First run Initialization of the deployer script”You need to have the follow details ready before you run the next command.
- Database host name - ‘localhost’ if you followed all the instructions to this point
- Database user name - ‘root’ unless you specify otherwise
- Database password - per the previous steps in OS Setup
- Hostname - The DNS Hostname for your machine, please create one if you do not have one already prepared
- API Token - This can be retrieved from the license keys section rConfig.com portal (remove the angel brackets < >)
Once you have the above details, run the following command to initialize the rConfig installation.
./rconfig8-vector-deploy.sh --mode=init --apitoken=yourApiToken --dbuser=user1 --dbpass="password1" --hostname=rconfig8vm.domain.localDeploy rConfig and verify installation
Section titled “Deploy rConfig and verify installation”After successful initialization, you can run deployments (updates) using:
./rconfig8-vector-deploy.sh --mode=deploy --apitoken=<someCode>Answer any prompts as needed You can select defaults by pressing the enter key.
Ubuntu Installation
Section titled “Ubuntu Installation”The Ubuntu install steps are similar to other distributions, but the scripts are different. If not done already, install a new Ubuntu server, and run the OS install script per the instructions in Ubuntu Setup Script.
Setup a MariaDB/ MYSQL User
Section titled “Setup a MariaDB/ MYSQL User”Ubuntu users will need to create a new user and password for the database. Login to the MariaDB/Mysql Database server using the root user. The root user password is the same as the one you used in the OS install script.
sudo mariadb -u root -pCreate the user and password for the database. And example is below, but you will need to change the username/password to something more secure.
GRANT ALL PRIVILEGES ON *.* TO 'user1'@localhost IDENTIFIED BY 'password1';FLUSH PRIVILEGES;quit;Download the deployment script
Section titled “Download the deployment script”sudo -isudo mkdir -p /var/www/html/rconfig8cd /var/www/html/rconfig8sudo wget https://dl.rconfig.com/downloads/rconfig8-vector-deploy-ubuntu.sh -O rconfig8-vector-deploy-ubuntu.shsudo chmod +x rconfig8-vector-deploy-ubuntu.shNote: Hit the enter key to accept the defaults when prompted during the download and setup process.
First run Initialization of the deployer script
Section titled “First run Initialization of the deployer script”You need to have the follow details ready before you run the next command.
- Database host name - ‘localhost’ if you followed all the instructions to this point
- Database user name - The username you created in the previous step
- Database password - The password you created in the previous step
- Hostname - The DNS Hostname for your machine, please create one if you do not have one already prepared
- API Token - - API Token - This can be retrieved from the license keys section rConfig.com portal (remove the angel brackets < >)
Once you have the above details, run the following command to initialize the rConfig V8 installation:
sudo ./rconfig8-vector-deploy-ubuntu.sh --mode=init --apitoken=yourApiToken --dbuser=user1 --dbpass="password1" --hostname=rconfig8vm.rconfig.comDeploy rConfig and verify installation
Section titled “Deploy rConfig and verify installation”sudo ./rconfig8-vector-deploy-ubuntu.sh --mode=deploy --apitoken=yourApiTokenAnswer any prompts as needed. You can select defaults by pressing the enter key.
Update Apache web server
Section titled “Update Apache web server”sudo a2enmod rewritesudo service apache2 restartAdvanced Usage
Section titled “Advanced Usage”Command Line Options
Section titled “Command Line Options”The deployment script supports several command-line options for flexibility:
Required for Init Mode:
Section titled “Required for Init Mode:”--mode=init- Initialize a new installation--apitoken- Your rConfig API token--dbuser- Database username--dbpass- Database password--hostname- Server hostname
Required for Deploy Mode:
Section titled “Required for Deploy Mode:”--mode=deploy- Update existing installation--apitoken- Your rConfig API token
Optional for Both Modes:
Section titled “Optional for Both Modes:”--dbhost- Database host (default: 127.0.0.1)--dbport- Database port (default: 3306)--help- Show usage information
Examples
Section titled “Examples”Custom database settings:
Section titled “Custom database settings:”./rconfig8-vector-deploy.sh --mode=init --apitoken=abc123 --dbuser=rconfig --dbpass="mypass" --dbhost=192.168.1.100 --hostname=rconfig.company.comUpdate existing installation:
Section titled “Update existing installation:”./rconfig8-vector-deploy.sh --mode=deploy --apitoken=abc123403 Access Forbidden Error after update
Section titled “403 Access Forbidden Error after update”If you encounter an 403 Access Forbidden error after updating to Vector Server, you may need to clear out some cached RBAC related data.
The error may look like this when opening the Settings > Agents page for example:
To do this, run the following command:
#This error is typically caused by cached data from the previous version of rConfig.
redis-cliselect 1keys *del KEYNAME #(anything with permisssions in it)
exitcd /var/www/html/rconfig8/current && php artisan rconfig:clear-all
Heres a video example of the process:
Rollback Feature
Section titled “Rollback Feature”If you need to rollback to a previous version:
./rconfig8-vector-deploy.sh --mode=rollbackDeployment Features
Section titled “Deployment Features”Zero-Downtime Deployments
Section titled “Zero-Downtime Deployments”rConfig V8 uses a symlink-based deployment strategy that ensures zero downtime during updates:
- New releases are deployed to timestamped directories
- Symlinks are updated atomically
- Previous releases are retained for quick rollback
Progress Tracking
Section titled “Progress Tracking”The new deployment script provides real-time progress tracking:
- Visual progress bars
- Step-by-step status updates
- Comprehensive logging to
/var/log/rconfig-deploy.log
Error Handling
Section titled “Error Handling”Enhanced error handling includes:
- Detailed error messages
- Recovery suggestions
- Support contact information
- Complete operation logging
Post Installation
Section titled “Post Installation”Once this process has completed without errors you may login to the server IP address or hostname with the following credentials:
Username: [email protected]
Password: admin
Troubleshooting
Section titled “Troubleshooting”Common Issues
Section titled “Common Issues”-
Permission Errors
- Ensure you’re running as root
- Check file ownership:
chown -R apache /var/www/html/rconfig8
-
Database Connection Issues
- Verify database credentials
- Test connection:
mariadb -u username -p -h hostname
-
API Token Problems
- Verify token from rConfig.com portal
- Check network connectivity to dl.rconfig.com
-
Service Issues
- Check Apache status:
systemctl status httpd - Check Supervisor status:
systemctl status supervisord
- Check Apache status:
Log Files
Section titled “Log Files”- Deployment Log:
/var/log/rconfig-deploy.log - Apache Logs:
/var/log/httpd/(RHEL/CentOS) or/var/log/apache2/(Ubuntu) - Application Logs:
/var/www/html/rconfig8/persistentData/storage/logs/
Getting Help
Section titled “Getting Help”If you encounter issues:
- Check the deployment log file
- Review this documentation
- Contact V8 support: [email protected]
- Visit the support portal: rConfig.com Portal
Migration from V7
Section titled “Migration from V7”If you’re upgrading from rConfig V7, the V8 deployment script will:
- Automatically detect existing installations
- Preserve your data and configuration
- Remove legacy Envoy components
- Update to the new deployment system