Collecting RNEs
Collecting RNEs
Section titled “Collecting RNEs”Once an RNE has been discovered, it behaves like any other rConfig device: it has its own config snapshots, history, diffs, and schedule. The only difference is how rConfig reaches it.
Routed through the gateway
Section titled “Routed through the gateway”An RNE has no management address of its own, so rConfig collects it in-band through its GNE:
- Look up the RNE’s gateway GNE.
- Open a session to the GNE and log in with the GNE’s credentials.
- Send the RNE’s commands with its TID in the address field, for example
RTRV-EQPT:RNE-STL:ALL:100;. - The GNE routes each command to the RNE and returns its reply. rConfig confirms the reply came back as the RNE (the response header carries the RNE’s TID) and saves it against the RNE device.
You collect an RNE the same way you collect anything else: open it and click Download Now, add it to a task, or run the CLI against its device ID.
# Collect a device by ID (example device ID 6512).# An RNE is routed through its GNE automatically.php artisan rconfig:download-device 6512 -d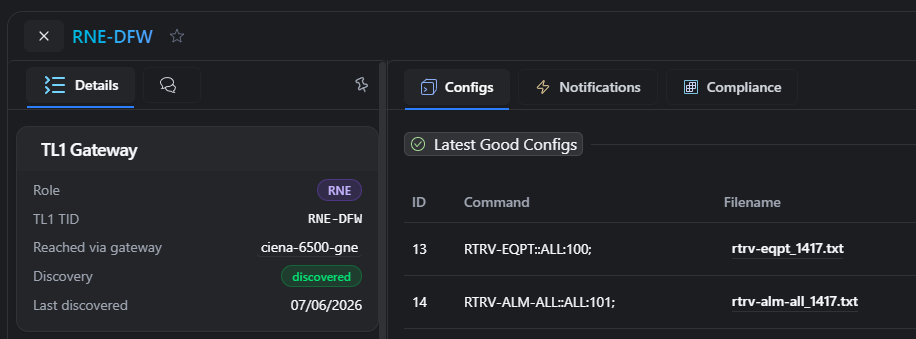 The TL1 Gateway panel on an RNE, linking back to its GNE
What you see
Section titled “What you see”The TL1 Gateway panel sits at the top of the device view:
- On a GNE: the list of RNEs behind it, each linking to its own device view.
- On an RNE: its TID, its discovery state, and a link back to its gateway GNE.
Config snapshots, diffs, and history work on an RNE exactly as they do on a directly-connected device.
Scheduling
Section titled “Scheduling”Because each RNE is its own device, you schedule it independently. Note that every RNE collection opens its own session to the gateway, so a GNE fronting many RNEs will see one login per RNE per run. Stagger large fleets across tasks if the gateway is sensitive to concurrent sessions.
Next step: Troubleshooting TL1 collection.