
Infrahub Device Sync

Infrahub Device Sync: End-to-End Setup in rConfig V8.2.0
Section titled “Infrahub Device Sync: End-to-End Setup in rConfig V8.2.0”The V2 Infrahub driver pulls device inventory from an Infrahub instance using its GraphQL API and feeds the results through the unified V2 pipeline. This guide follows the same model as the Statseeker V2 setup: only the Setup tab fields and upstream-side conventions are different.
| Platform | rConfig V8 Support | Auth supported | V2 Status |
|---|---|---|---|
| Infrahub | V8.2.0+ | API token | Lab tested |
Mental Model: End Goal First
Section titled “Mental Model: End Goal First”The point of setting up a V2 integration is to land in a steady state where rConfig’s device inventory is continuously reconciled against Infrahub on a schedule, with no operator in the loop. That end state looks like this:
A Scheduled Task of type Integration V2 Job runs the Infrahub instance in Apply mode on a cron, e.g. nightly. It runs the same six-stage pipeline you’ll run interactively in this guide, writes any
createandupdatedecisions to rConfig, leaves any conflicts or ambiguous matches in Problem Devices for review, and notifies you on completion.
To get there, you walk a one-time setup and a sanity-check loop:
- Create the integration instance: Infrahub connectivity, GraphQL query and auth in the Setup tab. Validate with Test Connection.
- Set a Default Device Profile. Infrahub does not surface per-device profile metadata in the default schema, so devices take the instance’s Default Device Profile (V8.4.3 and later).
- Run an Extract Preview to confirm your GraphQL query returns the right Infrahub devices.
- Run a Sync Preview to walk the full pipeline (canonicalize → reconcile → decide) without writing.
- Run a Full Sync (Apply) once the preview’s decisions look right.
- Schedule the integration to run on a cron from the rConfig scheduler.
%%{init: {'themeVariables': {'fontSize': '60px'}}}%%
flowchart LR
    A[Create instance<br/>Setup tab] --> B[Test Connection]
    B --> C[Device Profiles<br/>Inventory]
    C --> D[Extract Preview]
    D --> E[Sync Preview]
    E --> F[Full Sync · Apply]
    F --> G[Scheduled Task<br/>recurring sync]

  classDef step font-size:60px,stroke-width:2px;
  class A,B,C,D,E,F,G step;
Prerequisites
Section titled “Prerequisites”Infrahub:
- A reachable Infrahub instance with the GraphQL API enabled at
/graphql - An API token for a service account with read access to the configured root field (default
InfraDevice) - Network connectivity from rConfig to Infrahub
- A working knowledge of Infrahub GraphQL: the default query covers the standard
InfraDeviceschema, but you may need to adjust it for your data model
rConfig V8.2.0+:
- Administrator access
- rConfig V8.4.3 or later to create devices. The default Infrahub schema has no profile-slug attribute, so every device takes the instance’s Default Device Profile, which arrived in V8.4.3 (see Step 2).
Step 1: Create the Integration Instance (Setup Tab)
Section titled “Step 1: Create the Integration Instance (Setup Tab)”1.1 Open the V2 driver picker
Section titled “1.1 Open the V2 driver picker”Navigate to Platform → Integrations. Scroll to the Device Sync section and click + Add Driver under V2 Drivers.
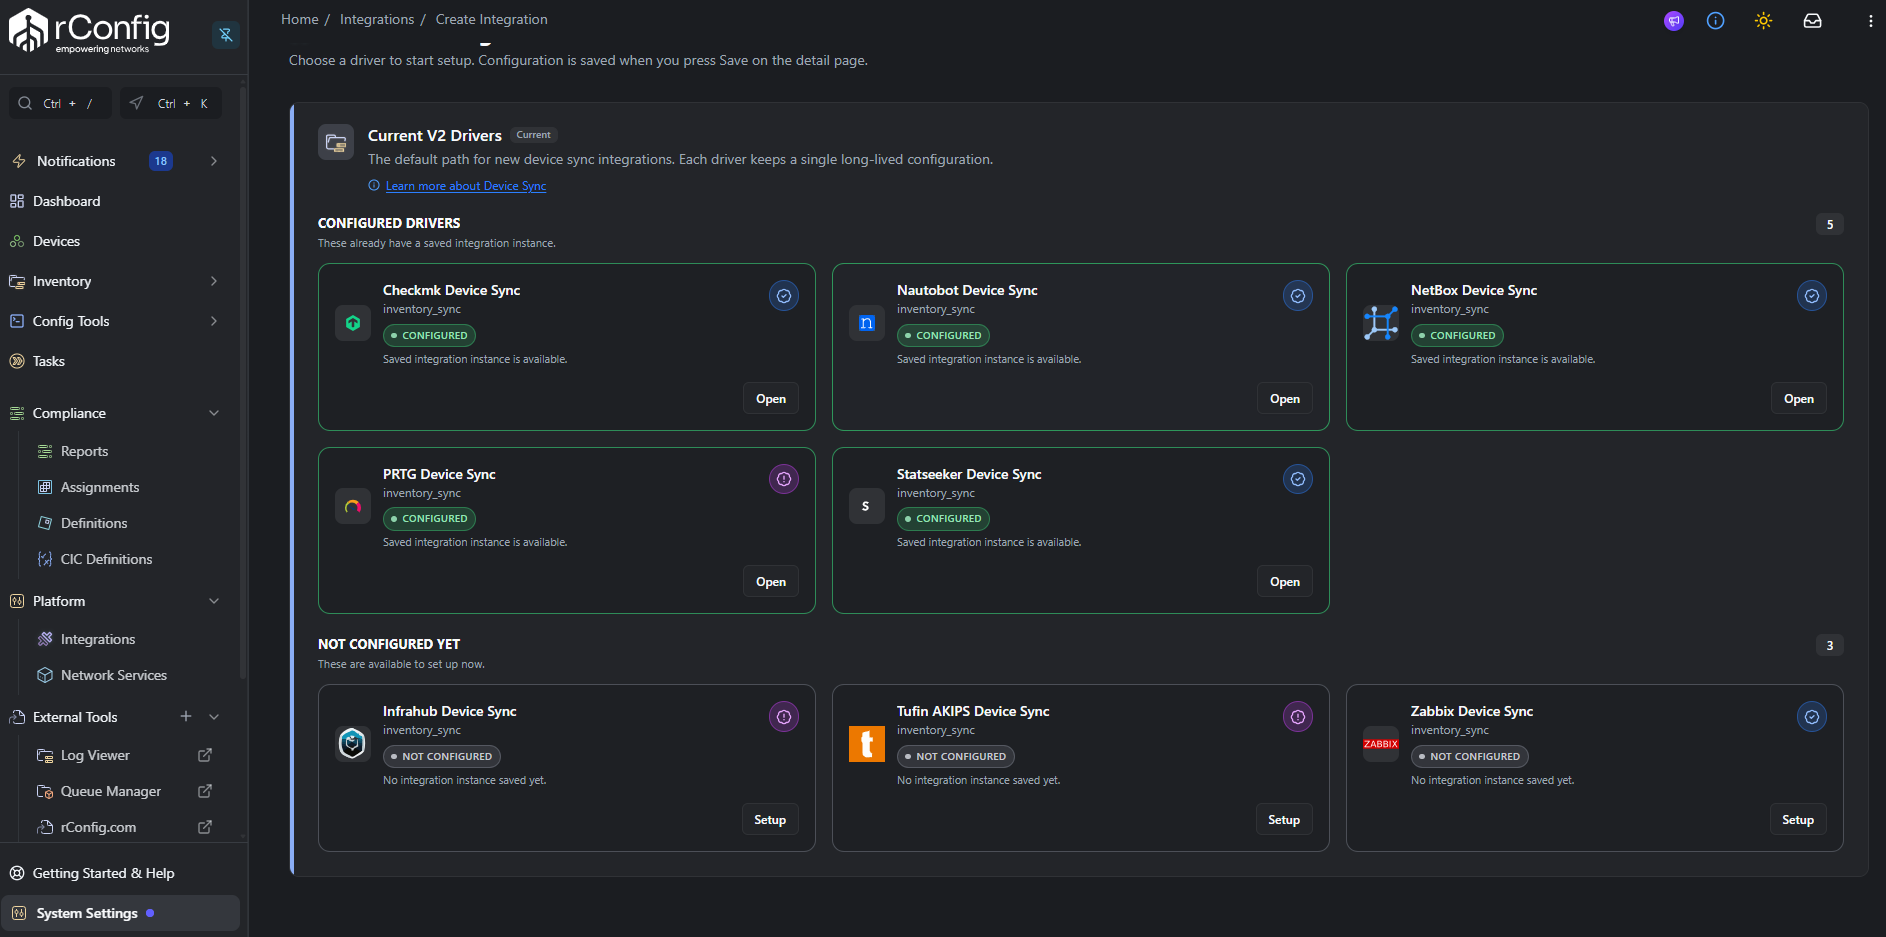
The Infrahub card carries a Lab tested badge: click it to open the Setup tab.
1.2 Fill in the schema-driven Setup tab
Section titled “1.2 Fill in the schema-driven Setup tab”The form is rendered from infrahub.schema.php and is laid out in two sections.
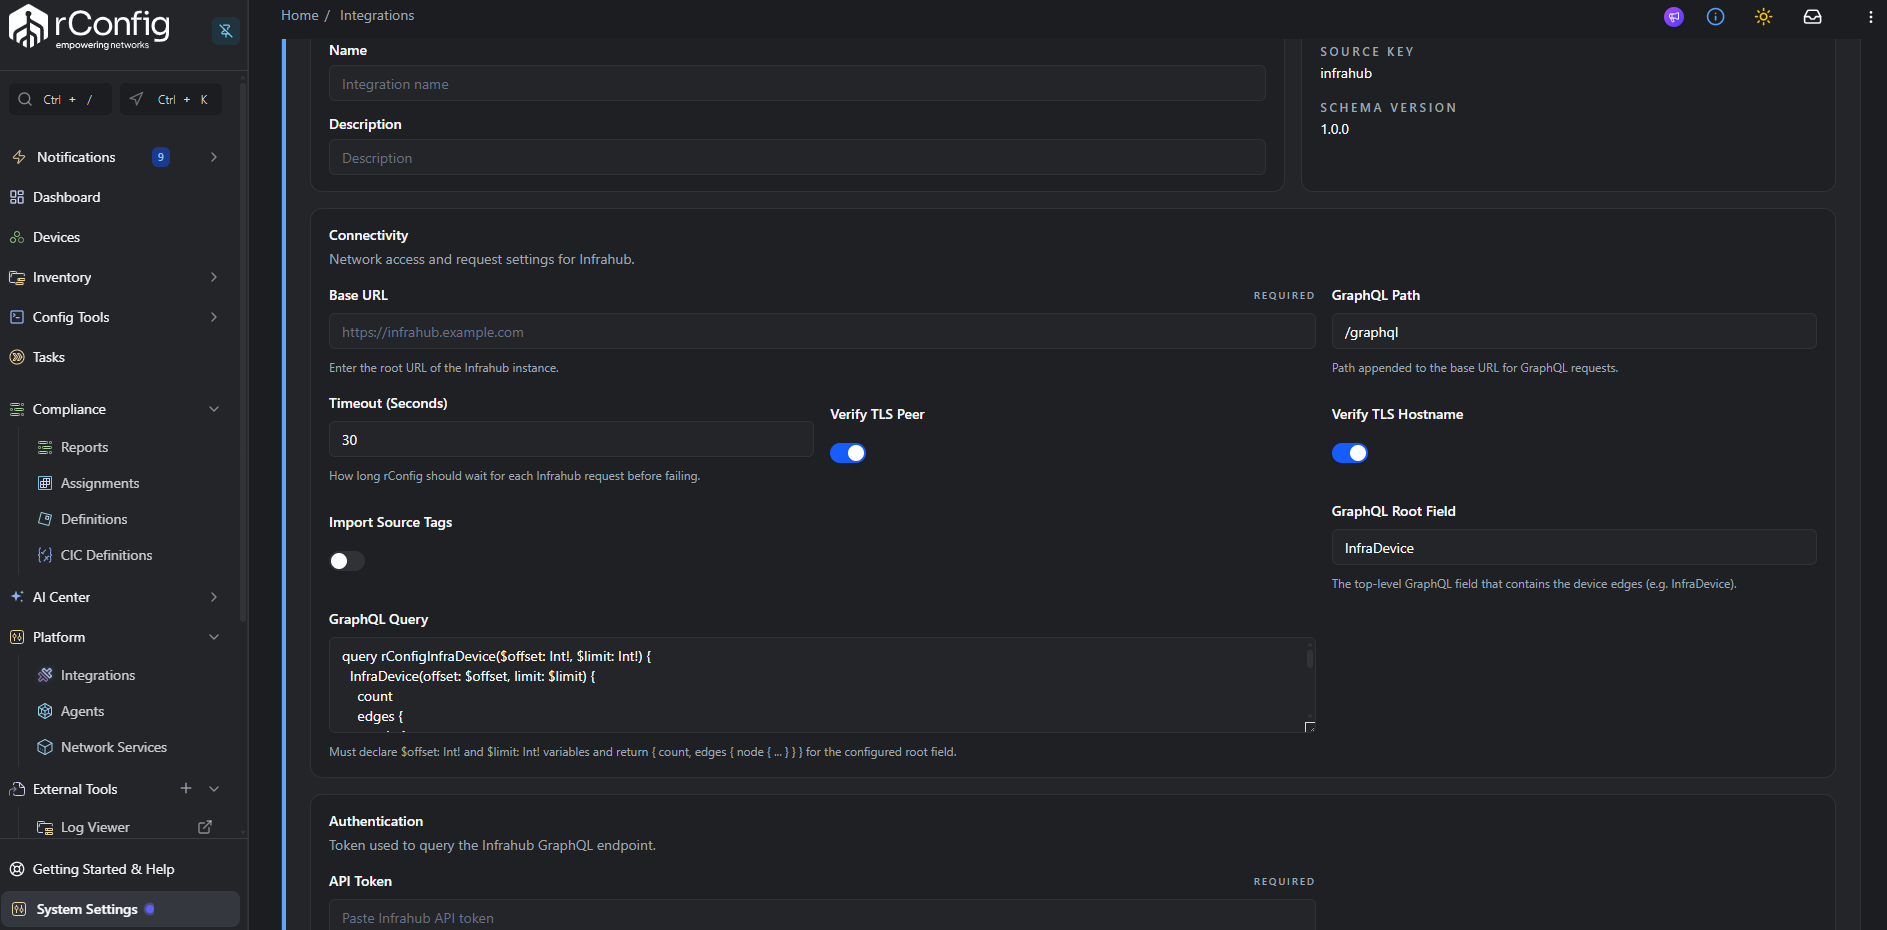
Connectivity
| Field | Default | Notes |
|---|---|---|
| Base URL | required | Root of the Infrahub instance, e.g. https://infrahub.example.com. No trailing slash needed. |
| GraphQL Path | /graphql |
Path appended to Base URL for GraphQL requests. |
| Timeout (Seconds) | 30 |
HTTP request timeout. Range 1–120. |
| Verify TLS Peer | on |
Leave on for production. Disable only for self-signed labs. |
| Verify TLS Hostname | on |
Leave on for production. Disable only for hostname mismatches in labs. |
| Import Source Tags | off |
When on, Infrahub tags become canonical tags in rConfig and are attached on Apply. |
| GraphQL Root Field | InfraDevice |
Top-level GraphQL field that contains the device edges. Change if your Infrahub schema names devices differently. |
| GraphQL Query | provided (see below) | The query rConfig sends. Must declare $offset: Int! and $limit: Int! and return { count, edges { node { ... } } }. |
The default GraphQL query is:
query rConfigInfraDevice($offset: Int!, $limit: Int!) { InfraDevice(offset: $offset, limit: $limit) { count edges { node { id name { value } primary_address { node { address { value } } } platform { node { name { value } } } device_type { node { name { value } manufacturer { node { name { value } } } } } tags { edges { node { name { value } } } } } } }}Customise it to surface additional fields (location, role, custom attributes): but keep the count / edges { node { ... } } shape the driver expects.
Authentication
- API Token (required). Generated under Account in Infrahub. Stored as a secret. The driver sends it as the
X-INFRAHUB-KEYheader.
1.3 Test the connection
Section titled “1.3 Test the connection”Click Test Connection in the action bar. The driver POSTs a small introspection-style query to the configured GraphQL Path with X-INFRAHUB-KEY set.
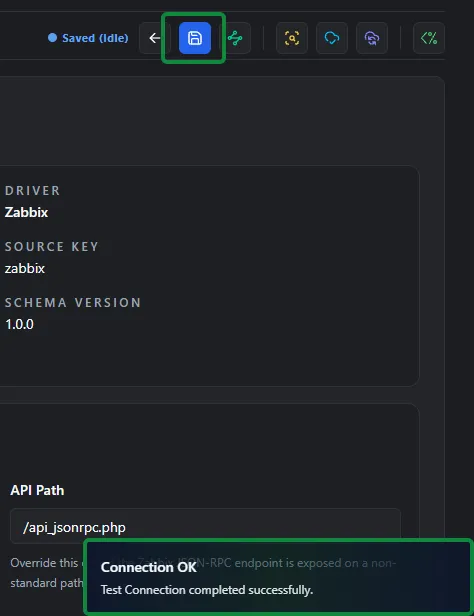 Setup tab after a successful Test Connection (green status pill). Shown with the Zabbix driver. The Infrahub screen is the same.
Common failures:
| What you see | Most likely fix |
|---|---|
| Connection refused / timeout | Wrong Base URL or firewall in between rConfig and Infrahub. |
SSL / certificate error |
Self-signed cert: toggle Verify TLS Peer / Hostname off (lab only). |
401 / 403 |
API token revoked, expired, or scoped to an account without GraphQL access. |
200 with GraphQL errors array populated |
Configured root field doesn’t exist, or the query doesn’t compile against the schema. |
1.4 Save
Section titled “1.4 Save”Click Save. Move to Step 2 before running a preview.
Step 2: Set the Default Device Profile
Section titled “Step 2: Set the Default Device Profile”The default Infrahub schema does not carry a profile-slug attribute, so the driver can’t read a profile from each device. Every Infrahub device takes the instance’s Default Device Profile (V8.4.3 and later).
2.1 Create the Device Profile and set it as the default
Section titled “2.1 Create the Device Profile and set it as the default”Navigate to Inventory → Device Profiles → New Device Profile, fill in vendor, category, template, credential set, and save.
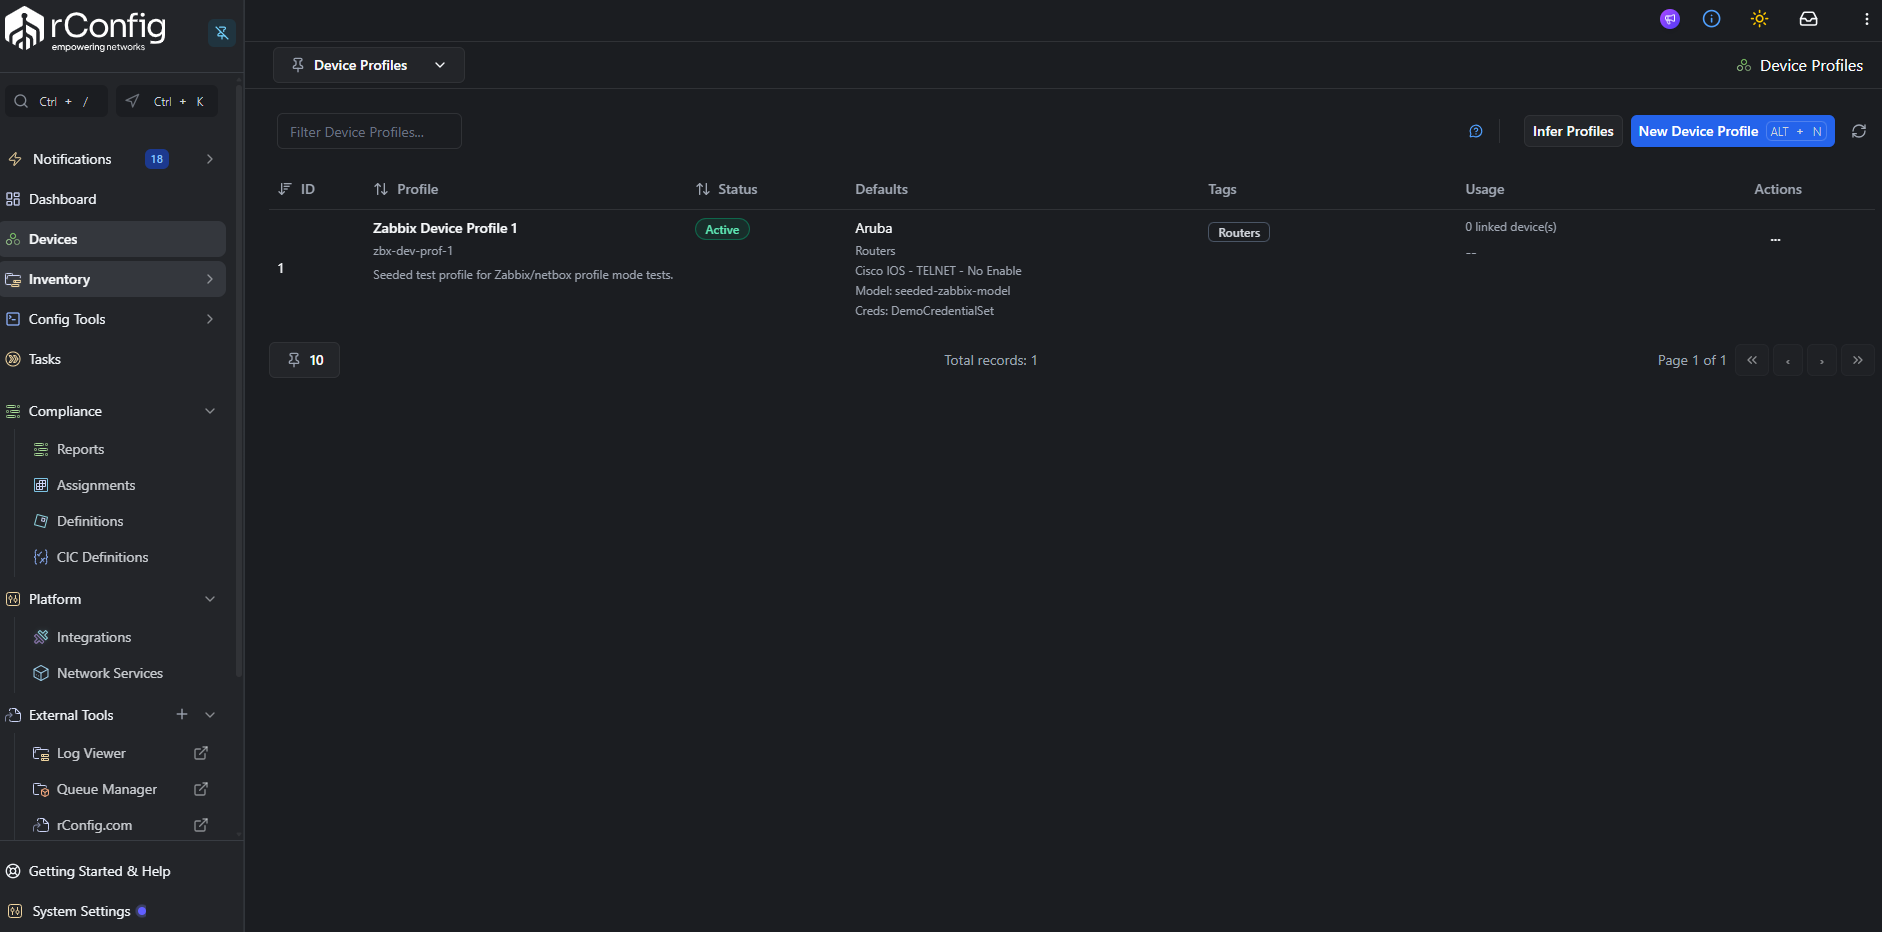
Back on the Infrahub integration’s Setup tab, choose the profile under Default Device Profile and save. If the profile is later deleted, candidates are rejected as Device profile unusable until you choose another.
To give different device classes different profiles, run one Infrahub V2 instance per class, each with a GraphQL query scoped to that class and its own Default Device Profile.
2.2 Customise the GraphQL query (optional)
Section titled “2.2 Customise the GraphQL query (optional)”The default query returns the most common Infrahub device fields. Common customisations:
- Add a
location { node { name { value } } }block to use Infrahub locations as additional rConfig tags. - Filter at query time by adding a GraphQL filter argument (e.g.
InfraDevice(role__name__value: "router", offset: $offset, limit: $limit) { ... }): this is the Infrahub-native way to scope a sync. - Add custom attributes (
my_custom_attribute { value }) so they appear in the Extract Preview row Details for diagnosis.
Step 3: Run an Extract Preview
Section titled “Step 3: Run an Extract Preview”Click Extract Preview in the action bar (amber download icon).
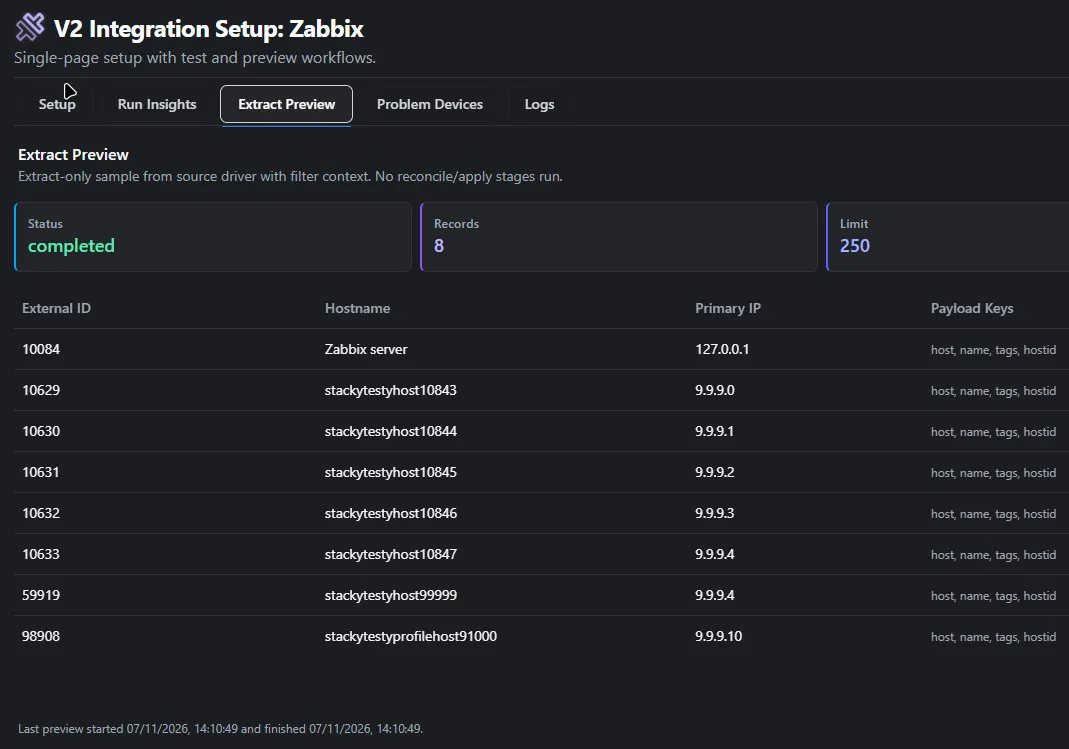 Extract Preview tab with summary cards and result table. Shown with the Zabbix driver. The Infrahub screen is the same.
The driver issues the configured query with offset = 0 and the schema’s default page size, walks the result set page-by-page, and returns one row per edges[].node.
Open a row’s Details hover to see the full payload: confirm name.value, primary_address.node.address.value, device_type.node.name.value and any custom fields you added.
For the full anatomy of this tab, see the Extract Preview Tab reference.
Step 4: Run a Sync Preview
Section titled “Step 4: Run a Sync Preview”Click Preview Sync in the action bar (sky icon). Sync Preview runs the complete pipeline through decide and stops without writing.
Switch to the Run Insights tab to inspect the result.
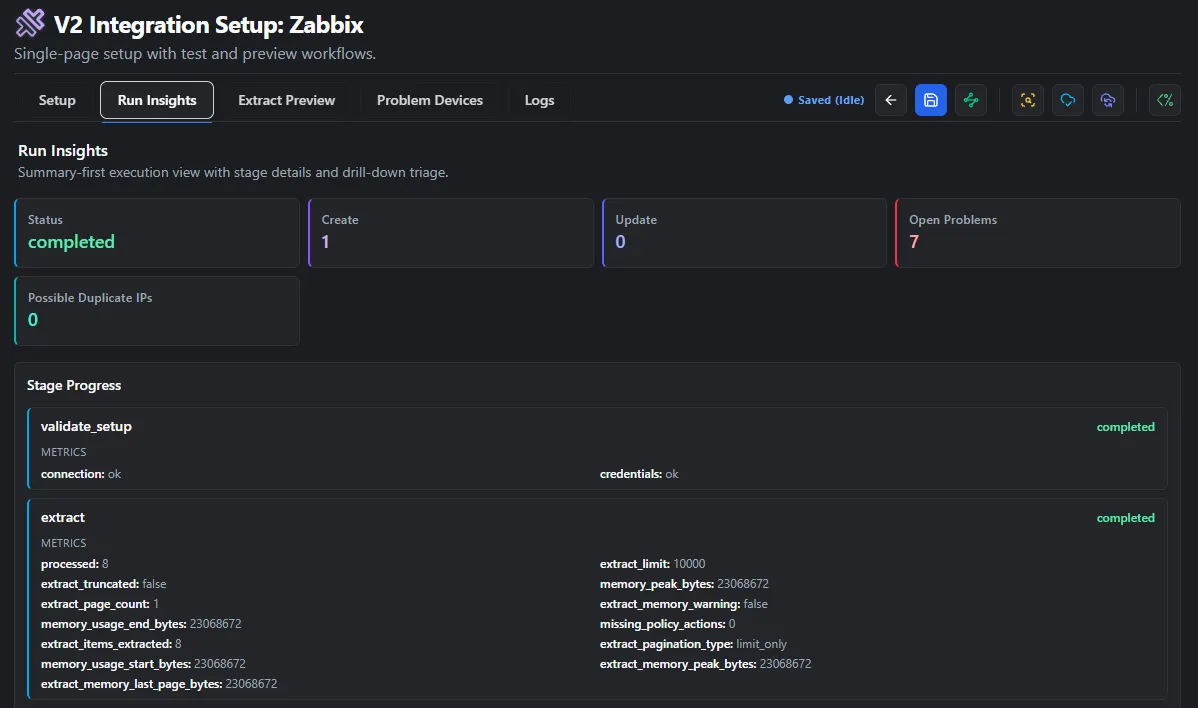 Run Insights tab populated after a Sync Preview. Shown with the Zabbix driver. The Infrahub screen is the same.
For Infrahub the most-watched stage metrics are:
extract.items_extracted: should match the GraphQLcountvalue.canonicalize.invalid: non-zero usually means a node has noprimary_addressset, orname.valueis empty.reconcile.ambiguous: non-zero means more than one rConfig device matches the same Infrahub node.
If Open Problems is greater than zero, switch to the Problem Devices tab and triage the rows.
For the full anatomy of these tabs, see the Run Insights Tab reference and Problem Devices Tab reference.
Step 5: Run a Full Sync (Apply)
Section titled “Step 5: Run a Full Sync (Apply)”When the Sync Preview decisions look correct and Open Problems is at an acceptable level, click Full Sync in the action bar (indigo icon).
Full Sync re-runs the full pipeline and finishes by executing the apply stage:
- Creates new devices for each
decision = create, on the instance’s Default Device Profile. - Updates existing devices for each
decision = update. - Syncs canonical tags onto the device when Import Source Tags was on at Setup.
- Updates
integration_device_links(first_seen,last_seen). - Schedules an initial configuration backup for newly created devices.
Run Insights tab after a Full Sync, with the apply stage card populated. Shown with the Zabbix driver. The Infrahub screen is the same.
Re-check Problem Devices after Apply.
Step 6: The Debug Console
Section titled “Step 6: The Debug Console”For any of the runs above, you can swap the action-bar button for the Open Debug Console button (shimmer icon).
 Debug Console modal mid-run. Shown with the Zabbix driver. The Infrahub screen is the same.
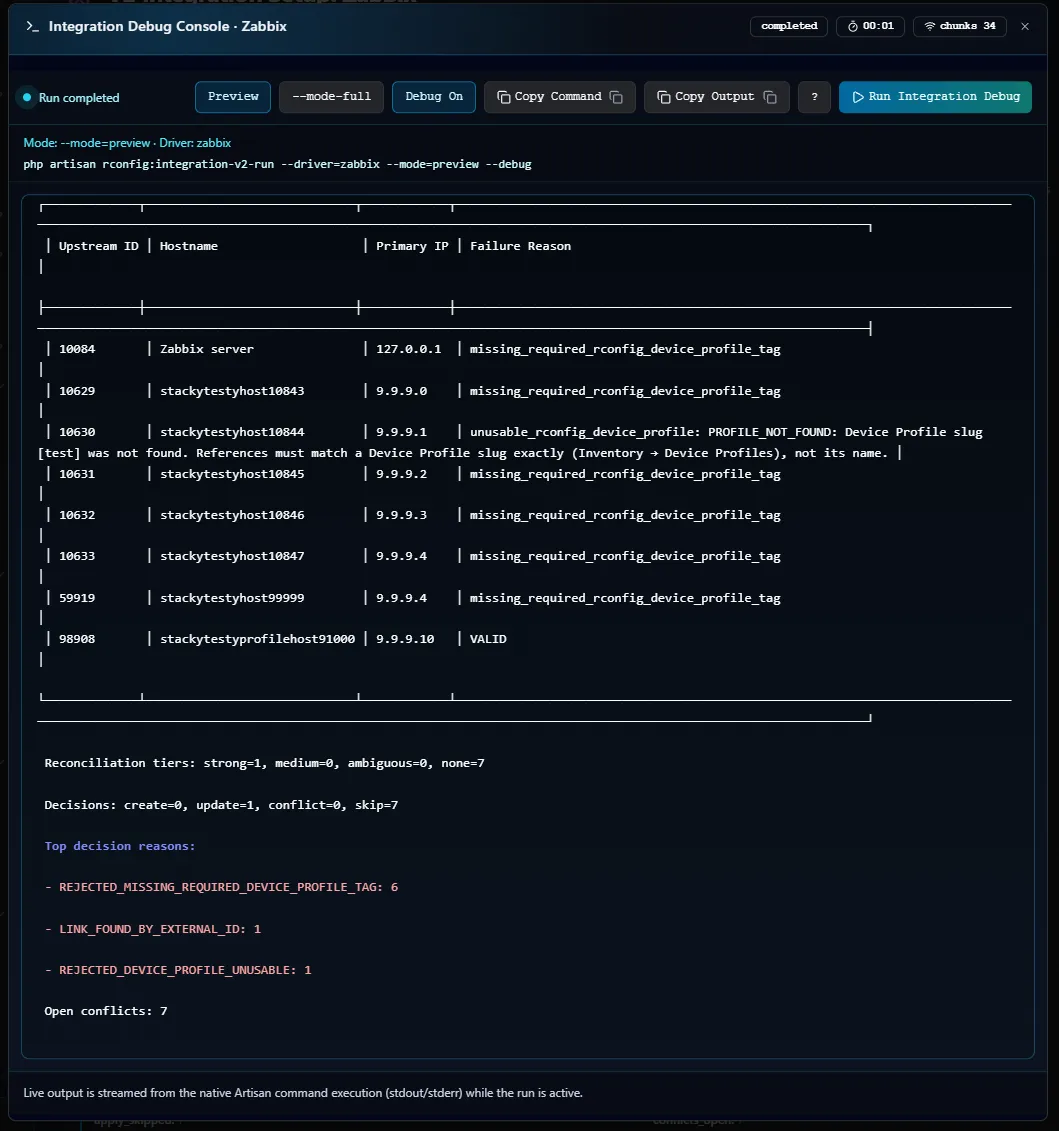 Debug Console modal after a run completes. Shown with the Zabbix driver. The Infrahub screen is the same.
For the full anatomy of the dialog, see the Debug Console reference.
Step 7: Schedule the Sync
Section titled “Step 7: Schedule the Sync”Once a manual Full Sync completes cleanly, navigate to Tasks and click New Task. Choose task type Integration V2 Job, pick the Infrahub instance, choose Apply mode, and set the cron schedule.
CLI Reference
Section titled “CLI Reference”# Sync Preview (does not write)php /var/www/html/rconfig8/current/artisan rconfig:integration-v2-run --driver=infrahub --mode=preview
# Full Sync (Apply) by explicit instance ID, with debug outputphp artisan rconfig:integration-v2-run 24 --mode=apply --debug
# Queue an async runphp artisan rconfig:integration-v2-run 24 --mode=apply --queueDriver Reference
Section titled “Driver Reference”Infrahub fields the driver reads
Section titled “Infrahub fields the driver reads”| Canonical field | Infrahub payload paths checked, in order |
|---|---|
| External ID | id |
| Hostname | name.value |
| Primary IP | primary_address.node.address.value |
| Serial | not populated by default schema |
| Vendor | device_type.node.manufacturer.node.name.value |
| Model | device_type.node.name.value |
| Tags | tags.edges[*].node.name.value |
| Profile slug | not populated: the instance’s Default Device Profile is used (see Step 2) |
Reconciliation policy
Section titled “Reconciliation policy”- Strong match: by
instance_link_external_id(Infrahubid) only. - Medium match: hostname and primary IP both unique in rConfig.
- No automatic medium-match auto-relink, no cross-family matching.
Missing upstream policy
Section titled “Missing upstream policy”The default mode is disable_link_only: when a previously-synced Infrahub node disappears from the GraphQL result set, rConfig disables the integration_device_links row but leaves the device intact.
Troubleshooting
Section titled “Troubleshooting”- Test connection passes but Extract returns zero devices. Run the configured GraphQL Query directly against Infrahub via a GraphQL client to confirm the query itself returns rows. The Test Connection only proves auth and schema-compatibility, not a populated result set.
- GraphQL
errorsarray populated in stage output. The query failed to compile or the configured Root Field doesn’t exist. Confirm the field name matches your Infrahub schema (it is case-sensitive). - Canonicalize flags many candidates as invalid. Most common:
primary_addressnot assigned in Infrahub, or your customised query forgot to include the address path. - Every candidate lands in Problem Devices as
missing_required_tag. No Default Device Profile is set on the Setup tab. Set one and run again. - Reconciliation produces ambiguous matches. Two rConfig devices share the same hostname or primary IP. Resolve in Problem Devices by picking the correct target.
- Slow runs / very large extracts. Tighten the GraphQL query with filter arguments to reduce the result set, or increase
timeout_secondsif the GraphQL response itself is slow.
Using a source of truth to drive rConfig’s inventory, and bringing it to an rConfig that already has devices, is explained in the Integrations guides:
 Uplink guideSource of truth first: NetBox, Nautobot and InfrahubDrive rConfig's inventory from NetBox, Nautobot or Infrahub: what the pattern gives you, how profiles and filters work, and where it needs care.Read the guide